Since I first integrated wireless window sensors with rat traps (see here for original post: https://lensprojects.com/2022/11/18/a-better-mouse-or-rat-trap-seriously/), I found a new solution that eliminates carpentry work, increases range (up 1/4 mile according to the sensor manufacturer), and is safer and easier to set. The new design uses a Victor bait station: https://www.amazon.com/dp/B0BCMSRSNC
a Victor M144-2B trap: https://www.amazon.com/dp/B0CCWRKQ56
and a long range LoRa door/window sensor: https://www.amazon.com/dp/B0CCWRKQ56
The sensor use a low power wireless technology called LoRa, which stands for “long range”. The best deal I could find on these is from company call YoLink. They sell two sensors and a hub for $40 on Amazon. A hub is required to connect the sensors to your network. Once you have the hub, you can add other long range sensors and home automation devices.
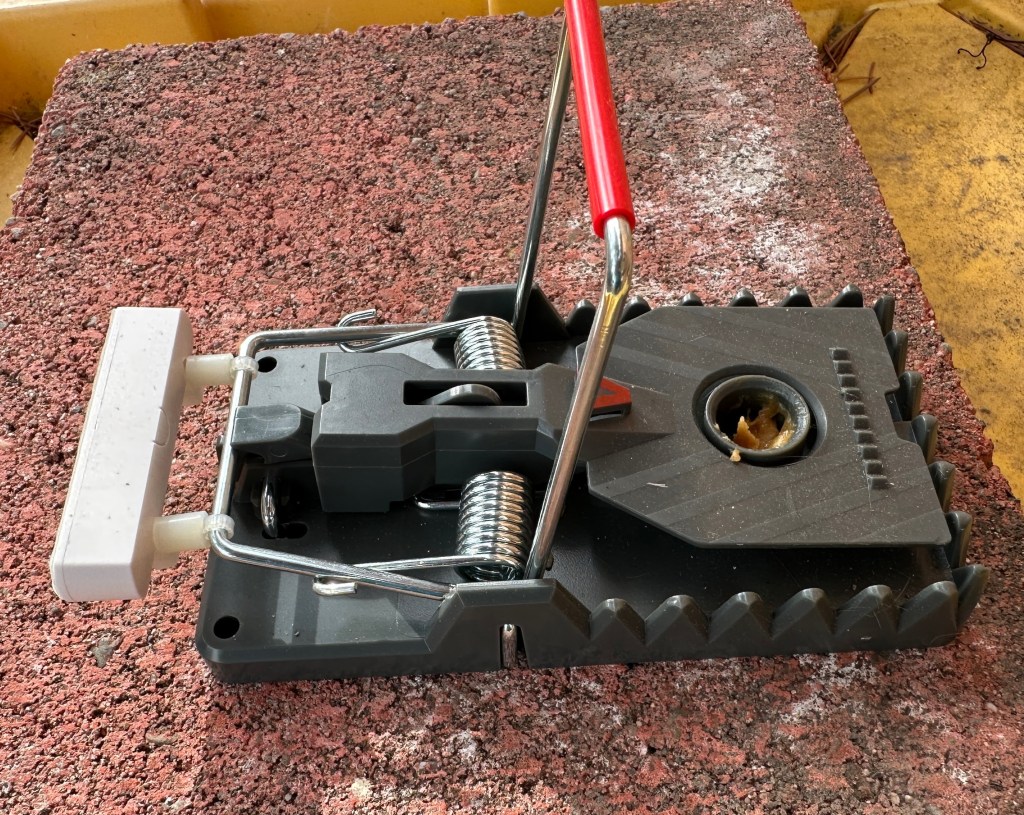
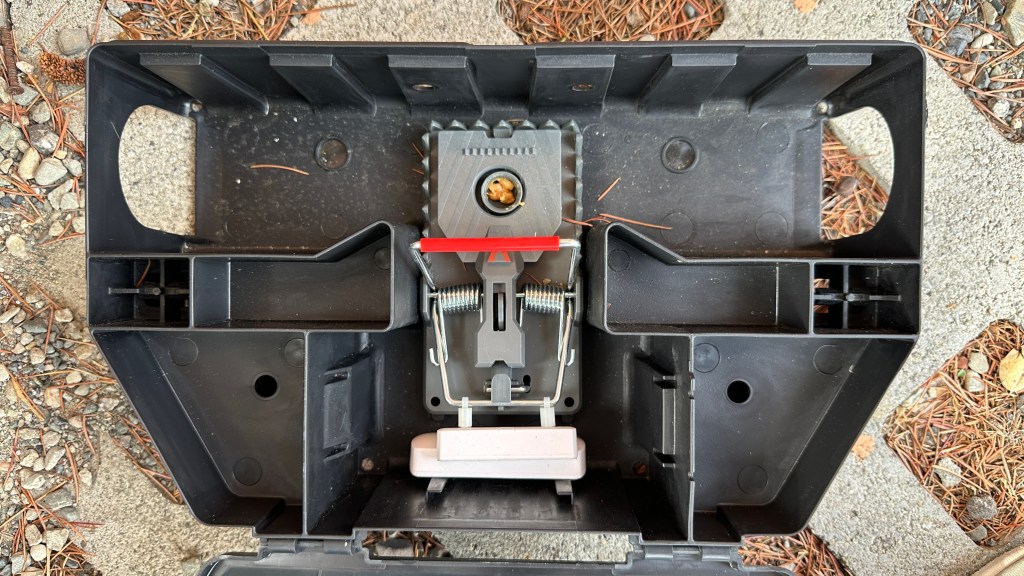
The trap has a setting bar that is separate from the “kill” bar that hits the rat. This allows the trap to be set without putting fingers in harms way. It also provides a convenient place to attach the sensor magnet using only zip ties and some nylon spacers. When the trap is set, the setting bar holds the magnet near the transmitter so the sensor reads “closed”. When the traps trips, the setting bar rises, pulling the magnet away from the transmitter, which then signals “open”. The transmitter/senor is simply placed inside the box at the bottom just behind the trap. Another advantage of these bait boxes is they can be used outdoors.
Here is what the set-up looks like: